This is a lesson designed to prove that teaching about colours doesn't have to be limited to dictations, simple colouring or talking about your favourite ones. This CLIL lesson includes elements of Art, Music and Science.
I have to mention about my assistant, Ms Ewelina Stus, who is also a teacher in my school and eagerly engages herself into CLIL lessons and their planning. Most of the activities were designed by her.
Aims: Students can name three primary and four secondary colours. They can do an experiment with milk and food colouring, they can sing a song about colours.
Task 1
I talk to my students asking whether they know any names of colours in English. I ask them some simple questions asking to indicate examples of these colours in the classroom. Then, I explain that today we are going to do some colourful magic. They are always intrigued hearing that :)
Task 2
I show them a song by Sesame Street.
After watching it a few times depending on students' willingness, we talk about the colours presented in the song and the whole process - if they have noticed what happens when two colours are mixed.
The conclusions should be:
blue and yellow = green
red and yellow = orange
red and blue = purple
Variation! If you have time and an access to the IWB a perfect idea would be to ask students to become these colours (as the men in the song) and try to mime as it follows.
Task 3
I introduce notions: "a primary colour", "a secondary colour", "to mix". Now we can go straight to the experiment.
I show the instruments: a plate, a paintbrush, milk, food colouring in three primary colours, dish soap.
I explain that this is the part with magic and I will need their help. Giving all the instructions in English we go through all the steps:
 |
| 1. Pour some milk into the plate. |
 |
| 3. Drop some food colouring in three different places of the plate. |
 |
| 5. Touch each spot of paint gently and see what happens. |
 |
| 6. When you have all three secondary colours on your milk, stir everything up and see what colour you have now (brown as we get it when red, yellow and blue are mixed). |
1. Pour some milk into the plate.
2. Wait until the milk is still.
3. Drop some food colouring in three different places of the plate.
4. Pour some dish soap onto the paintbrush.
5. Touch each spot of paint gently and see what happens.
6. When you have all three secondary colours on your milk, stir everything up and see what colour you have now (brown as we get it when red, yellow and blue are mixed).
IMPORTANT! The milk should be fat about 3%. Less fat can result in the failure of the experiment.
If you have some time left or your experiment has failed - show this film.
Task 4
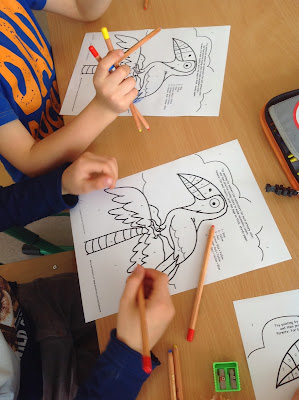
Especially for this lesson I bought some dry pastels in three primary colours. Each student gets three pencils and using only them they have to colour the worksheet according to the instructions. This is also a chance to show them how to use this kind of pastels, how they can mix colours using their fingers etc.
Sometimes they have to exchange pastels as the number of them is limited and it is a chance to practise asking for objects: "Blue, please", "Here you are", "Thank you".
Task 5
We arranged a display of their works.


